Ways Your Students Can Use Audacity

In the Audacity Tutorial you discovered the ease of Audacity to record, edit, and export your audio. But, Audacity is as powerful as it is simple to use.

Music:
I have seen many garage, Indie, and professional bands mix their work with Audacity. This is why Audacity work are called project files. In Audacity, click the drop down menu Project. From there you have the option to import other tracks from a previous recording or MIDI file. Another way to get multiple tracks in a project is to click Record like you would normally, then push stop. Pushing Record again will start another track recording.

You can also highlight a certain part of the track or all of it and click on the drop down menu Effect, there is an endless amount of things you can do to distort, modify, and change the sound.

Podcasting/Webcasting:
A podcast or webcast is simply recording of a show, lecture, general audio that is not live. It is a recording saved for later. This is incredibly useful for later recall but can also be a valuable way for your students to record their learning.

Once you have your recording, click on the Project drop down menu and click Edit ID3 tags. This is the information that shows up on your computer music player (e.g. "Title: Quadratic Equations").

Physics:
When studying sound waves it can be really helpful to see such an abstract concept visually. With Audacity you can record yourself singing (if you are so brave) or find all of the different pitches within a song you imported. To do this, click on Analyze and Plot Spectrum.

You could also record two different tracks with two different pitches and zoom in to see the waves created. If you would like to create a specific frequency, click on the drop down menu Generate and click on Tone. The students really enjoyed it when we discuss the Mosquito Ringtones, it really drives home the point about how our ear works and threshold of hearing. They freak out when they are unable to hear what their peers are able to.

For analyzing sound live, I highly recommend the Visual Analyzer software. It is so much fun to watch the students challenge each other to make the different frequencies and they love to see their music change the wave. For a typically invisible concept like sound and air pressure, I am grateful to both Audacity and Visual Analyzer for making their software free to all.

I would also like to recommend a blog post by a fellow #EdChat Tweeter David Wees. He had a lot of great ideas that I would recommend you take a look at.

Google Apps Ideas Tutorials (Gmail, Docs, Forms, Calendar, Sites)

How to use Google Apps to Level the Playing Field
Gmail, Labels, Chat
Google Documents
Google Calendar
Google Sites

Google Sites - The Five Essentials to Getting Your Site Up and Running

Google Forms For Online, Easy, and Free Data Collection

Audacity is All You Need to Record, Edit, and create Audio

Audacity is one of those applications that make people amazed at the generosity and power of Open Source. Everytime I show this app, they cannot believe that this is available for free. Audacity allows you to record, edit, export sound all in one easy interface. You can download it from the Audacity website. It will work on pretty much every Operating System you can imagine.

Once you have it downloaded, do a test run to make sure all of your sound settings are correct. To do this click on the big red button in the upper left. 

Talk into your microphone and you should see sound waves appear on the screen below it. If you don't see this: 1) Make sure you are talking loud enough, 2) Check your sound settings (Windows: Click on Start, Control Panel, Sound and Audio Devices, the Audio tab at the top, and finally under sound recording click Volume and make sure it is turned up)

You may already have a microphone built into your computer which is perfect for podcasting and basic recording. If you are really in a pinch, take your earbuds (like those for your iPod), plug them into the microphone slot and you have a makeshift microphone. Speakers and Microphones are pretty much the same thing just in reverse.


To playback push the Green Play button. The red line will show you where you are in the recording.

Once you are done with your test, you can delete the test by clicking on the X on the track you just recorded. 


Editing Your Track:
Let's say you are recording your speech or music and you make a mistake. Just keep going because you will edit it out later with ease. If you can edit a document you can edit audio in Audacity. After your recording is finished, use the sliders at the bottom of the screen to move it to the approximate time. The click and drag your cursor to highlight the area you would like to remove (if you are unsure if you are in the correct spot, click play and Audacity will only play the highlighted area). To remove the selection, click Backspace or Delete and your selection will be deleted and shift everything up. Couldn't be easier right?

You can do the same thing to copy and paste a selection, to repeat a sound over and over. A lot more settings can be found in the aptly named Edit menu at the upper left just as if you were editing a document.
You may find it useful from time to time to get a very specific part of your recording. Click on the magnifying glass under the menu bar. 

Move the mouse over the area to magnify, left click to zoom in and right click to zoom out. Click on the selection tool right above the magnifying glass to return to the ability to highlight and edit.

Saving and Exporting your Files:
Audacity is easy for recording and editing, but it is just as easy to create files for sharing your music or sound with the world.

Save Project for later:If you are not finished with your work just yet, you should save it as a project so you can come back to it later. Click File and Save Project. It will prompt you to save and then create an Audacity Project File (.AUP) and a Data folder. Do not separate the Project File and the Data folder or you will not be able to reopen your files.

Export WAV: A standard file that can be played on any computer. It tends to be a larger file than if you made an MP3. Click File then Export as WAV, you will be prompted to save and then Audacity will create your file.

Export MP3: One of the most widely recognized and playable sound file types in the world, you will most likely want to export your file as an MP3 as it is playable on mobile devices and is smaller than a WAV file. To export your sound as an MP3 you will need an additional free plugin. To download it, click on the following link, LAME MP3 Encoder. Once installed, you can click on File and then Export as MP3 in Audacity. 

NOTE: Audacity is using a large amount of memory to create your file. If you notice that Audacity is running slow or crashing often, close other programs and make sure you are not sharing to a networked drive. At our school, our students had a networked "My Documents" folder that it would default to saving to. This would slow down the entire network and crash Audacity. This is not a problem for those of you who are saving to your hard disk.

I hope you will find many uses for this powerful software. If you have any questions, send me an email or leave a comment. In the follow up post, I will review some of the ways you can use this software for music, podcasting, Physics, and more! Stay tuned.


Project Based Learning Best Practices Part 2

With projects as with almost anything, if you plan effectively, you are more likely to find success with your project. However, project planning is not just about the product, the process and assessment require just as much thought as what you are going to make/do.

Organizing a Project:
When I start a project, as I said in project based learning part 1, I will use forward design. So once I have decided upon the concept I would like the students to know and apply, I write that down in a Google Doc. It is important that you use some cloud based service or if you are going low tech, a piece of paper that you carry everywhere. The reason being, once your mind starts thinking about this, you will have flashes of inspiration at the most random of times.

I will spend a week or so simply adding the document until I reach a critical mass of thoughts about the project. Then I go through and organize it by topic (assessment, resources for materials, ideas for products, etc). You will find that the project practically orders itself. If you do not have much experience with projects to fall back on, it is most helpful to go talk to another teacher or colleague about it. You will find that your ideas will double and many of your concerns will be answered when seen from a new perspective.

Make sure you create a calendar of some sort where you have expectations of what will be done each day. Create extremely clear instructions to avoid confusion. If you have not yet made a model or example of the product, do so. If you have an exhibition in mind, consider how it will be displayed and where. My second year of teaching project based learning, I decided we would make life size boats out of PVC to study buoyancy and volume. We were about half way done building these amazing boats when it dawned on me, I had no idea where we are going to test them!

How Long Should a Project Last:
There is no strict rule that projects should be a week or a month, it depends on the project. However, if you have created a detailed calendar you should be able to estimate. I say estimate because unforeseen factors too numerous to mention will emerge and slow down or speed up your pace. To compensate for this I always build in at least two "fudge" days, to allow for mistakes or obstacles. I do not tell the students this as this might encourage them to slow down, but it is important to have them as you will find that students + projects = scheduling uncertainty.

Make sure you align your calendar with your school and local calendar. It would be a shame to have an exhibition due on the same day as a religious holiday or have your project broken up over winter break.

To summarize, careful planning will help you determine a pretty good estimate of the time needed.

Assessment:
This could be a post all by itself. If you are trying to achieve learning through projects, then a performance based assessment would seem to fit best. If you choose to use a paper based assessment to ensure understanding, make sure you align it to the project. Just because a student spent time applying the concept of slope, does not mean that they understand every aspect of it but if you are aware of that you can properly assess what they know.

While this isn't a one size fits all approach, my experience has determined that there are 4 main areas of a project through which one can assess.

  1. Self Assessment - Reflection on what went well and did not go as well.
  2. Group Assessment - How well did this person work with others, did they do their share of the work?
  3. Audience Assessment - Does your exhibition achieve the goal which it was intended to (teach 2nd graders a science lesson, put on a Shakespearean play, increase community awareness about global climate change, etc)?
  4. Teacher Assessment - Is the project of high quality, does it meet the expectations and parameters of the project?
As for grading, this is a choice to be made by the educator/school/district. Depending on the assignment, these areas are weighed differently. 

Rubrics are useful for determining to what degree a student has completed a task or shared the work. However, rubrics can skew the data heavily if students do not properly fill them out or are being nice to their friends. It is for that reason that I require that a response on a rubric be accompanied by anecdotal  evidence about why they assigned that grade (example: give an example of when the student helped out the group). Rubrics can be administered very effectively through Google Forms. It will collect and sort all of the data for you which saves a ton of headache at the end of a project. 

If you can plan your assessment into your project you will save a ton of heartache and stress. What this means is for the student to complete the project they need to understand the content. In all of my math projects, the student cannot proceed or complete the project until a previous step is calculated. Similarly if you structure your project to require feedback, the students can help each other to learn and improve the project.

Teacher Refinement:
If you are not refining your own work, then you should not ask the students to do it. Even the best planned out projects can still become better. I highly encourage you to keep a document where you can quickly jot down ideas on how to refine for next time. I call mine "Math/Physics for next year" and I am eternally grateful for that document because there is no way I would ever remember all of the feedback I gave myself throughout the year.

I wish you all the best as you seek to use an exciting and enjoyable way to work with students towards understanding. If you have any comments, questions, or suggestions, don't hesitate to leave a comment.

Project Based Learning Best Practices Part 1

Project Based Learning can be a wonderful experience for you and your students. However, there are some things to consider to avoid frustration and to accomplish that what you are hoping to achieve.

Before we get started, know that my Colleague John has created some great food for thought at his Blog, I encourage you to check out and reflect upon his thoughts.

Forward Design vs. Backwards Design:
Forward Design is where you start with the learning objective and move towards the product and process. Backward Design involves envisioning the product first and then deriving the learning objective  afterwards. I tend to lean more towards Forward Design only because when I have tried to do backwards design, the learning seems less deep and contrived. I am not saying it cannot be done, but it takes a lot more work to do it well and the focus tends to be more on the product than on the learning.

When creating a project though, you will find that it is not a linear process at all, the product will emerge and refine over time; as will the learning objectives and the process. I would just encourage you to start with what you want them to learn as this will help you have a strong anchor point throughout the process.

Audience:
Just as important as the learning objective is the audience as it drives the project and determines the process. Typically, the audience is only the Teacher and I would avoid that being your only audience. It sets up an adversarial situation where students will only come to you asking whether or not a product is worthy of an 'A'. If you are not the sole audience, you can be the master helping them to refine and achieve their goal without as much focus on the grade.

Knowing explicitly who your audience will determine the how as in how much, how many, how deep, etc. It might not be wise to rely upon an algebraic equation for  your students to teach 5th graders the meaning of slope. If you have already determined your audience, it is a great idea for your students to meet them or get their input before starting the project. This puts a real face to their work and motivates them all the more.

Audience members are anyone who is going to see and interact with the project. If you do not have one for your project, look in your district for Elementary/Middle Schools. The teachers there are always very welcoming. You might have community resources like a Earth Day Fair, City Council meetings, History Museums, Zoos, Businesses. I have seen all of these and more be very effective audiences. You have nothing to lose by asking, and the opportunity this will provide your students to have a
 real world location to demonstrate their learning is priceless.

Class, Group, or Individual Project:
There is no one solution, it depends completely on what you are trying to accomplish.

Class Project: This setup is very useful if you are trying to create a large product as you can break it down into departments (e.g. writing, filming, building, painting, etc) or components (top,middle,bottom). Also, since you are building just one or a couple of the product it will cut down costs dramatically or allow you to make something of higher quality.
  • What you will need to be particularly mindful of is the learning. With such a large project broken down into pieces, will each student learn the same thing with the same depth? While some say that giving a traditional assessment or giving a lecture (front-loading) is a way to avoid this, I prefer to have all of the learning and assessment take place within the project itself otherwise it diminishes the reason for doing the project in the first place. 
  • It is also possible that students will have days where they simply do not work, this is easy to happen as you are so busy orchestrating. Two possible solutions to this are to assign class leaders to take care of the administration and completion of the project so you can focus on classroom management and refinement, or to have students update a daily log through a Google Form, Twitter, Blog, etc.
  • When my teaching partner and I considered making Electric Guitars we had to decide whether or not to make 30 or 3. Something would have to be sacrificed as the saying goes, "Fast, Cheap, and Quality, you can only have two.

Group Project: Students are more likely to learn the same as their peers or at least not have the learning divided up as much. The costs are certainly more than a class project but less than an individual project. Also, there is a greater chance for each group member's ideas to be heard as opposed to a class where they might have less of a say in how it turns out.
  • Be mindful of the fact that when students are in closer interaction with each other, there is a higher risk for conflict. It would be a good idea to talk to students about conflict resolution and understanding what their triggers are. I have seen groups where a "ringmaster" was assigned. Not a leader in the traditional boss of the group sense, but in the mindset of a circus where the ringmaster does not lead but manages. The ringmaster's role is to keep the project moving and make sure it all comes together without coercion or unnecessary stress on the group.
  • Additionally, I would suggest implementing Google Docs to collaborate and share files and information. It is devastating to a group to find out that one or more of their group members is absent (and they always seem to be the ones with all of the work).
Indivdual Project:  There is a 1:1 ratio of product to student and therefore it is easiest to design an assessment that measures work and learning that has occurred. The student is able to fully express their creativity and completion is completely on them.
  • The biggest factor in this type of organization is cost. Even a project that only costs $5 per student is going to cost hundreds to complete. I try and alleviate this by choosing individual projects that use household items or are paper based.


Note: There is no one type of project that works for every scenario. Evaluate what your most important goals are so you can choose that which works best. It is possible to minimize the shortcomings of each of these with in depth planning.

Inspiration and Motivation: I have written previously about resources you can use for designing projects, but where do the ideas come from in the first place? The answer is everywhere. They will just pop out of nowhere, when you are driving home, taking a walk, reading a magazine, etc. Have a way of writing these ideas down (I send a message to my email) then keep a document of all of your previous ideas, even those you did not end up using as they will be used someday.

In part 2, we will examine other important aspects of planning and implementing a project like assessment and exhibition.

Create Beautiful Work Through Feedback and Refinement

Would you like people to come into your classroom and gasp? Receive comments like, "Your math class reminds me of an art gallery!" Or get looks of disbelief when you tell them the work was created by High School students? Then you crave beautiful work.

Beautiful work is a term that was popularized by Ron Berger of Expeditionary Learning. If you ever get the chance to see him or have him come to your school, it will transform your culture. He travels, giving professional development about why we and our students should not accept work that is of poor quality. These are not platitudes that can never be achieved in a typical classroom. He brings example of students work, from teachers all over, where you truly are amazed at the power of human creativity.

How does this happen? Why do we not see this more often in the classroom? The reason is that to achieve beautiful work you need three things:

1) Models of beautiful work: This could be a well written essay, an art piece, a well derived proof, but something that represents the standard that you wish your students to achieve. If you do not have such a model, then create one yourself. 

Once students see these models, it is easy to determine what it is that makes it high quality beautiful work. How can we expect students to create beautiful work if they have not ever seen it? Explicitly determine with your students what the standards of high quality are (complete sentences, clearly explained well thought out proofs, straight lines and angles, etc). The intention is not to create something to be duplicated exactly but to set as an example of quality.

2) A willingness to refine: Is your culture one where students are encouraged to do their best? Do your assignments or projects lend themselves to something worthy of taking the time to do well? Do you provide time for drafts and revisions? If the best reason a student has for doing well on an assignment is for a good grade, then I suggest you reflect upon how you can foster a more intrinsic desire to do well.

3) Peer Feedback: After you share your models and standards are created, students begin their work. Once they have completed their work inform them that this is their first draft and it is necessary to receive feedback in order to know what to refine. I have used the process of "3 before me" (3 students and then myself); or personal refinement, followed by peer feedback, and then finally feedback from me. 

I don't want to imply that only 3-5 revisions are necessary, it may take more, it could potentially take less. It depends on their prior skills, mindfulness, and the strength of the feedback they receive.

Effective feedback is not something we inherently do. We are quite good at judging whether or not someone else's work is beautiful to us or not, but not at articulating why. This is a skill that must be taught and practiced to become good at.

Effective feedback must be Kind, Helpful, and Specific:
  • Kind: Respectful of the fact that this is someone else's work and to judge without thinking of their feelings could kill the creative spirit and willingness to refine.
  • Helpful: Feedback is intended to help the recipient make their work better. It is not to steer them in a different direction but to help them more fully realize their vision. Feedback such as, "What if you used squares instead of circles," or "Could you change the dialog of this character to something more happy" is not helping the student make their work higher quality.
  • Specific: In order to actually refine, it must be known what it is that needs refinement. You cannot throw the baby out with the bathwater and start from scratch each time. It must be a process where each iteration builds upon the previous one. Therefore, specific feedback must be given in order for the recipient to know exactly what to work on.
  • There might be a tendency for your stronger students to receive feedback that is too praiseworthy and not actually helpful, or struggling students to receive too much feedback and be overwhelmed. Individual conversations between the teacher and student can help alleviate this and get everyone the support they need.
Do not be afraid of this process. While it may take more time than expected, the results will amaze you. Creativity will flow more freely in your classroom and your students will experience a deeper learning while you and the class collectively take on the responsibility of helping them to do their best work and understand. This is not simply for artistic "prettiness" it is a refinement of thought, understanding, and skill. It is just as important to refine for content as it is for aesthetic beauty, 

Imagine a world where everyone was proud of the work they had done. Typically, we consider this an endeavor only suited for artists and musicians but if everything you did was beautiful work, even that which we loathed to do, we would see a transformation in our classrooms and our world. Please foster that spirit of high quality work through cooperative feedback and refinement.

I encourage you to read the article Beautiful Work, or purchase his book, An Ethic of Excellence, which is relatively short but well worth your time.

With the permission of Ron Berger, I share with you a powerpoint that I created using some of the examples he most often shares to help others understand the concept of models, feedback, and refinement. I hope this information inspires and motivates you to create beautiful work with your students.

Math Puzzles, Games, and Writing Resources with Mr. L and Teacher to Teacher Press

It is not often that I will recommend that teachers spend money. Budgets are tight and we need to make every penny count. Therefore I only recommend books, technology, resources that I have used and have felt it worth the cost.

It is with that in mind that I encourage you to check out Mr. L's Math. He has a lot of great resources on his blog but what I have found most useful are the books and DVDs found at Teacher to Teacher Press run by Bill Lombard (Mr. L) and Brad Fulton. I have always been passionate about having math games in the classroom that also promote learning and Mr. L has quite a few books related to that subject.

In fact every single game I have played with my students from these resources has been a big hit with the students. Additionally, they are retaining the information and understanding it more deeply. If I am referring to a concept I can say, "Remember when we played..." and they will quickly remember and understand what I am talking about. Supplementing my math curriculum with games that have no cost except the cost of paper (see my post about how to save paper) and take up as little or as much time as you would like has brought a fresh air of enthusiasm to my students and I.

If this were all, then I would appreciate the books but they would not warrant an entire post on BrokenAirplane. For the last year I have been passionate about creating projects where the student learns by doing the project. For those of you uninitiated to the world of Project Based Learning, many times the learning is "front loaded" or taught in a traditional method as a means to completing or understanding the product. To me this undermines why I would do projects in the first place. If I want the students to learn by doing, then I needed projects which have them learn through the project itself.

As an integrated math/physics teacher I find it easier to create physics projects because they are more based in concrete reality (electricity, forces, motion, etc). Yet, the more challenging concepts to students are often the abstract concepts in math (negative numbers, geometric constructions, fractions/ratios). This is the other reason I was so grateful to find Mr. L's resources as their store carries a DVD simply called Math Projects. You will find these projects to be cost effective (often using just paper and free software) and able to be completed in a day or two. This, as they say, allows the benefit of using projects while still maintaining your districts' curriculum pacing.

Finally, I have seen many teachers in twitter #edchat and various blogs comment on the desire to have students writing in their math class. Spending time explaining or analyzing their thinking would greatly benefit the students ability to solve different or more difficult problems. Having read "The Language of Math" I can tell you that the team of Mr. Fulton and Mr. L do a great job of describing why and how this could be implemented in a classroom with effective tips and prompts that you could begin using tomorrow.

I realize that the cost might make you hesitate, but there are samples of student work of which you can get inspired from, and samples from the books themselves so you can see whether or not they will fit your classroom.

I am excited that my students are doing hands on learning with math and spending time playing with it in a way that is inviting to all. I hope that you will consider using these resources in your classroom so you too can enjoy the benefits.

How to Curb Plagiarism in Your Classroom

If our goal is to teach, our students is to learn, and our primary method of assessing that is through assignments and tests; then the highest concern is that of making sure each student has done their own work.

Before we discuss plagiarism, we should mention the term Digital Native. Digital Native is the name many have given the generation of students who have grown up their entire lives with Mobile Phones,Google, YouTube, Torrent Sharing, etc. Usually, the term is pejorative, saying that these students have no social skills, ability to think deeply, or respect for copyright.

All of these are true/false in varying degrees just as much as it would be for any other person on Earth. Stereotypes get us nowhere.

Plagiarism is considered a growing problem within schools because of the pervasiveness of the Internet. Sharing information and  files is so easy that students can find the definition of a word faster than they can say it.

I believe that plagiarism can be curbed if not eliminated from the classroom in a few ways. 
  • Plagiarism Checkers - There are free and paid versions of these. They allow you to cut and paste or upload a file to check it against the Internet to see if anyone has already used it. The problem with this is if someone from your own class wants to share with another student the online checker will fail. Basically, it will prevent them from plagiarizing sources but not other students. Additionally, this will only work for written work and not math for example. However, it does have it's place. Google will help you find the one that is right for you.
  •  Blooms Taxonomy - In a previous post, I suggested you reflect upon your curriculum and where it is on the Bloom's Taxonomy pyramid. If you are asking your students to recall a definition or equation then you are creating an environment where they simply need to ask a friend or Google for the answer. While you might think that Googling answers is a mentality that needs to be squashed. My challenge remains for you to assess the students through application and creation. It is pretty difficult to copy when each is expected to provide their own thoughts. 
    • For those in math, I recommend ALEKS and Accelerated Math. Personally I like ALEKS more because it explains and uses less paper. They both will create differentiated work for students to work at their own pace as well as have different copies of the assignment. If the thought of that creates fear from a grading perspective, fear not for both of these programs will grade them for you.
  • Copyright Education - Even veteran teachers are unclear about what constitutes fair use. Teaching students how to cite and when and what is appropriate for each assignment will go a long way. I would imagine this article would be true of any age, but it drives home the importance of clarifying the fine line. I also recommend this resource as it clarifies the law.
I always tell my students that, "No one cheats their way through Medical School". You can rest easy, that if they are cheating now, it will eventually catch up with them. Additionally I will quote Seymour Papert who pioneered Technology in the Classroom decades ago saying, "In the future, people will be hired not for what they  know, but what they are able to find."

Finally, I leave you with this funny and uplifting TED talk.

How To Save Paper in Your Classroom or Workplace

Over 550 years ago the Gutenberg printing press made information available to the masses. Books dropped significantly in price and the time to get information out to others did as well. This led to newspapers and other print media. Eventually technology improved to the point where anyone could print from home, it became so cheap and easy that we began to print everything.

The idea of using paper in schools is a recent one. The cost of copiers and paper has come down significantly but there is so much volume that it ends up being a significant expense. Most teachers have a horror story about the day that the copier broke and this speaks to our dependence on delivering content through worksheets and paper. This comes at significant cost to our environment (bleached white paper is a toxic and harmful process to water sources) and to our schools.

While changing this mentality could take some time I would like to share some resources and tips that might help you next time you think about hitting that print button.

1) Printer Settings: This is the easiest one as it is already built into your computer. Each time you click print a window opens up called the Printer Dialog Box.

  • In Windows you should see a drop down button under Pages per Sheet
  • On a Mac/Apple you must first select Layout and then you will see the Pages per Sheet option.

Depending on the orientation and size of the font you can usually fit 2 pages without a major problem. I have seen teachers create "mini quizzes" and then print out 2-4 per page which saves significant paper. Keep in mind that some of your students may be farsighted or simply prefer the larger font or space so I always have a couple printed normal size for them.

2) Printliminator (Print+Eliminator): While ads help pay for content and website logos and designs are pretty, they are deadly to a printer budget. Too often they are pictures in color and just simply eat up toner and space on your page. The Printliminator is a "bookmarklet" which means you create a bookmark in any browser you are in (best to have it on your main browser bar so it is quick and easy to access). Then when you are at the website you want to print, you click the Printliminator Bookmarklet.

Rather than take you to a new site, a new little window will popup with some options:


  • The primary way the Prinliminator works is you move your mouse over the area you would like to delete and when it turns red, you click and it will disapear. This isn't permanent so if you refresh the page or press UNDO on the Printliminator it will come back. 
  • Remove All Graphics - Keep in mind, this will do the job but also remove any graphics you need to print. It should only be used if it is just the text you want.
  • Undo Last Action - Simply takes you back to the original website one click at a time.
  • Send to the Printer - Brings up the Print Dialog box mentioned above so you could still print multiple pages per sheet.
  • Apply Print Stylesheet - Printliminator will try and do the hard work for you. Keep in mind like Removing All Graphics it may take out more than you want so be mindful of how often you use it.
3) Sheet Protectors: Sometimes the low tech solutions are the best. If you have a handout for a game/activity/lab that you would like your students to be able to write on but then be able to erase and use again then you will want to use this. Sheet protectors are those plastic envelopes that you can slide an 8.5"x11" piece of paper into. You can find them at office supply, department stores, and on Amazon.

Simply place the paper inside the sheet protector, use fine tip dry erase markers and you will be able to use the paper over and over again. I would suppose you could do this with laminating the paper as well, but the sheet protectors are more versatile.

May we all be more mindful of the paper we use and what we use it for. Until next time...

25 Tips for Teachers Both New and Experienced

I was asked at the beginning of the year to come up with my recommendations for new teachers. However, I think that this list is also useful as a reminder. If you do not work with tools, projects, or write comments to your students, feel free to substitute whatever applies to your classroom (materials, assignments, grades) as the principle is the same.


  1. Do not feel pressured to come up with the biggest and best projects. More does not always mean more learning and in my experience it can often mean less (or at least it is spread more thinly). You might think that your budget is huge but if you are not careful, you will find yourself halfway through the year without any money left.
    • You have two directions you can take a project:
      1. A big project that involves everyone - This can be cost effective (sometimes) but can also be a nightmare keeping everyone busy. There are ways to plan a project so everyone has something to do. However, it is most likely going to result in not every student learning the same thing.
      2. A bunch of smaller projects that groups or individuals are responsible for. - This could ensures that every student will learn what you are expecting but can cost a lot ($5/student is still about $250 for the project)
    • In my opinion the best projects find the balance between these two poles.
  2. Never create a project/assignment that isn't strong in content. You do not want to be halfway into a project and realize that you spent most of that time without much learning. 
    • The students and my favorite projects have been those which required the content to complete the project as opposed to simply a short design phase in the beginning and much of the time spent building or making.
  3. Purchase quality tools so you do not have to repurchase, then label and be diligent about checking them in and out. Especially around exhibition times, If you are bombarded with requests from students or other teachers to borrow your materials, it is always ok to say no or come back later when you can properly check out equipment.
  4. Feel free to ask for donations for materials, expertise, etc. Your parents and community will amaze you with what they can provide. However, if you are going to do it often or for a large amount make sure you consult your director/principal.
  5. I really appreciate these workbenches and how they help organize tools and materials in class. They can be made for any size and even be configured as shelfs. They are cheap and quick to build. Link to more technology I recommend to make life easier in the classroom.
  6. Sign up to undergo a project tuning (resource website) either officially or with another colleague. Even just casual conversations with others will generate new ideas and refine your project into something amazing. Do not believe that asking for help or feedback is a sign of weakness. We don't want our students to feel that way and neither should we.
  7. Create a system for clean up and spend the last 5-10 minutes of every class doing so. I have a rotating schedule of tasks with a student supervisor that works really well (link)
  8. Plan your entire year out. While that sound daunting, with exhibitions and projects, you do not want to run out of time. I would take the year schedule and make at least a block schedule of what concepts you would want to work with the students on and then you can fill it in more later. You will be grateful later for any planning you do in advance.
  9. Never assume that to do a project, you must "dumb down" or do not teach for depth of understanding. Always make sure your students understand what they are working on.
  10. It is ok to give homework, lecture, and test. We seek to be innovative but that does not mean that anything is forbidden when it is the best way of sharing/practicing/assessing skills and knowledge. Reflect upon how you were taught and how you can refine and improve that. 
  11. Ask for help from anyone and everyone, you will always find someone who will support you. It may feel like you are alone as you get swamped and busy but I can not say enough about how much you will grow to treasure and value your colleagues. Take a walk around the campus, walk into another teacher's classroom and be refreshed and inspired! If you do not feel like you are able to connect with your colleagues at school, connect with inspiring and sharing educators on Edutopia, Twitter, and other blogs. The Internet means no one is ever alone.
  12.  Work closely with your team teacher and members of your department. If you are able to create a cross curricular connection then all the better. The humanities and sciences have been separated in the classroom for far too long.
  13. If you have the chance to connect with students through a club, advisory, or otherwise; take advantage of it in every way possible. You have no idea how powerful an impact you can make on a student's life just by being interested.
  14. Start your final comments/grades early! The longer you put it off the less of a quality job you will do. I find that if you start early enough, divide the work by the number of days it is much easier. I would rather do a half-hour a day than 6 hours straight.
  15. Challenge your stronger students and support those who need it. The best way to do this is to keep an open dialog between you and your students to get their input as to what they need.
  16. Keep a class website and update it regularly so your Director/Principal and Parents can be well informed and support you.
  17. Imagine your students going to a well respected University. What do you want them to know? What would you like their Professors to say about your them? I love to go into Universities and see what great things they are doing, then I bring it back to my students so they can get a head start.
  18. Consider starting an after school program. You will not regret it.
  19. The Internet will fail, the computers might take a while to start up, and the printer/copier will jam/run out of paper/have a long line so always plan for that. With the copier/printer I always try and print everything out the day before so I am not stuck in the line 20 minutes before class.
  20. Take care of yourself. It is very easy to get overwhelmed and burned out so plan to take a break or a night off as often as you need to.
  21. Always keep a notepad or something where you can write down project ideas because they will come to you on a trip, at the museum, with friends, and at 2 AM.
  22. Phil's Law of Planning: However long you think a project will take, multiply that by 2 and then add a week. The only way to minimize this effect is with careful structured planning. Make clear your expectations to the students and give them clear steps on how they can achieve them.
  23. Have specific and high standards for their work. If they do not meet these standards, do not give up and move on, give them time to reflect and refine until they are proud of it.
  24. Allow yourself to fail. It is OK if your first project (or 20th) does not go well or is a total disaster. Reflect, refine, and move on.
  25. Most importantly, take time to get to know your students well. Teaching can either be a joy or miserable it is all in your daily perspective. I encourage you to enjoy every minute of it and remember what is most important.

If you have an additional tip that I didn't get to, would like clarification on one of them, or a resource mentioned, leave a comment, tweet, email, or Facebook and if you found it useful, share it on Digg, FB, or give it to a colleague who needs it.

Gmail Priority Inbox - Enable to See Your Most Important Emails First

You may be aware of the fact that 80-95% of all email sent each day is SPAM. SPAM is email that is junk to you and most everyone else (e.g. advertisements, unsolicited emails, etc). If you have Gmail, it is very effective at filtering out your SPAM and keeping you from ever seeing it.

Another email anomaly that we have all experienced is Bacn (pronounced Bacon). Bacn is email that you have asked for or from people you know but is not immediately important. There are plenty of blogs and newsletters that I have subscribed to but do not necessarily want cluttering up my email and preventing me from seeing that which is most important at that moment. Or you may want to ensure that certain people or emails get shunted to the top when you receive them (e.g. meeting changes, your boss, etc).

Gmail has recently introduced Priority Inbox to help out with this. It rolled out in part last week but by now everyone should have access to it. I encourage everyone to try it out and see if you like it. For my fellow Gmail Ninjas with very few emails in your Inbox, this may not be necessary for you. However, if you receive an overwhelming number of emails each day/week, this may be your favorite tool. 

You can activate it with the follwing: Click on Settings in the upper right. From the options at the top, select Priority Inbox, at the bottom select Show Priority Inbox, finally click Save Changes.

Now you should see your email divided up into 3 sections: Important and Unread, Starred, and Everything else. While this might be perfect for most of us, you may wish to go into the Priority Inbox settings again and customize it for yourself.

If you click on Add Section next to #3 (the empty one) you could also add the "Unread" filter for your email (which I have), and if you click on More Options you could select a filter as well.

If you click on Options next to the other Priority Inbox Settings you can change how many emails could appear in each section, the option to hide the section when empty (which I selected to keep things orderly), and the option to remove the section.

If you have set up filters for yourself, you can also select further on down whether or not Priority Inbox overrides this (the majority of you will not wish to override them unless Priority Inbox makes your filters redundant).

Click Save Changes and you will be taken back to your Inbox however it has now been split according to the sections you set up.

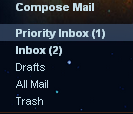
Priority Inbox refers to your unread and "important" emails whereas the Inbox indicator below it tells you how many total unread emails you have. You may look at your "important" emails and disagree with this qualification. This is because you have to train Priority Inbox to fit your needs.

The way emails are determined to be "important" or not is the frequency in which you send or receive an email from that person. However, this could be misleading if you have a newsletter that your receive everyday or a coworker that you email about your fantasy football team. 

In order to train Priority Inbox you select an email you think is important but is not considered important and click the yellow plus sign. If there is an email considered important but you do not consider important then select that email and click the gray minus button.


If you have selected it in the settings, you also have the option of starring an email and having it land in a separate spot. 

While this may actually seem like it will take more time out of your busy schedule, remember the words of Benjamin Franklin, "An ounce of prevention is worth a pound of cure." Taking the short amount of time to train Gmail which emails are important to you will ensure that you are always looking at what is most important. 

For those of you with a large number of emails your previous way of reading email was:
Hmm, I have a lot of emails, lets see which one is useful....no...no...no...and so on. 
The result? Wasted time and effort.

With Gmail Priority Inbox:
Hmm, I have a lot of emails,
-First I'll read my Important and unread Emails
-Next I will read my unread emails (BACN) at my leisure.
The Result? Know that your most important emails are taken care of and then handle the other emails.

Disclaimer: Priority Inbox rolled out just a week ago and while it is in Beta and works well, it is not infallible. Until you are confident in how you have trained it, skim your other emails to ensure you didn't miss anything.

If you have any questions or comments leave a comment. I hope that this provides help to those of you who need it. Until next time!


Links:
GSites - Websites
GForms - Data Collection and Surveys

1000 New Visitors

Thank you so much for coming to see what BrokenAirplane can do for your classroom. I always say though, if 1000 people have found this site useful then 10x as many people need it as well. So be sure to share the links through email, twitter, facebook, and the like.

I appreciate all of you who have come by and made this site what it is. The ideas and requests for posts are creative and helpful to a large group of educators. Everyday there is the opportunity for you to use technology in the classroom to help your students and yourself. I appreciate that you look to BrokenAirplane for help and guidance.

Please feel free to comment, email, tweet, etc with your ideas and requests for posts.

Pandora Provides Free Streaming Music for Your Classroom

If there is one thing that your students love, it is music. It has become such a pervasive part of our society. The technology is wonderful but it has the effect of shutting out the world. This, I believe is why so many schools have made the decision to ban MP3 players from school as they prevent teacher/student and student/student interaction.

I love music and have eclectic tastes. It is rare that I do not enjoy others music .I like to play music in the classroom when students are working. It provides a calming effect during math and helps foster interaction between students. The problem is that so many songs have inappropriate words which prevents me from using other student's playlists. To use my player would require sorting through my own music which would take a bunch of time. Plus, any list of songs gets tiring if you hear it enough.

This is where streaming music comes in. Sites like Pandora provide free music that learns from your tastes. For example say you like Pearl Jam, it will use an algorithm (geek fact: it is based on the Distance Formula) to suggest other bands/songs you might like. Based upon your rating of those songs it will begin to learn your tastes. This is a great service that I highly encourage you to take part in.

So every year at the beginning, I provide a Google Form asking for their favorite song/band to relax to and favorite to get energized to. Then I input those choices into Pandora and voila I have two class playlists. All I ask from the students is that they be polite when a song they do not like comes on because it is a song that someone else likes. 

There are other streaming services but I like how Pandora has a wide variety of songs, the ability to filter out inappropriate language, and provides hours of free music.

I hope you and your students benefit from the psychological benefits as well as the increased feeling of community.

Must Have Firefox and Chrome Downloads (Extensions and Addons)

Computers and Software are designed by people who may have very different intentions or expectations than you. Far too often users are frustrated with the inflexibility of their tools. This is one of the major advantages that Open Source has over Proprietary. The community has been able to create "addons" or modifications to the software to adapt technology to a wider group of people.

Many have begun to call the Internet a human right and most of us connect to that Internet through Browsers like Internet Explorer, Google Chrome, Mozilla Firefox, Safari and others. Firefox and Chrome have become widespread for both their speed, security, and ability to extend their usefulness. I would like to suggest some extensions/addons that I have found useful. Since there are such varied tastes I have limited the list to those that I think would be useful to most. I will update this list as more are developed.

If the link is broken, simply search for your browser and the name of the extension as these links tend to change. There are other browsers out there but Chrome and Firefox have the largest base of users so I wanted to keep it simple.

  • 3DTin - Modeling within the browser, export to your 3D Printer or other modeling/CAD software. (all browsers)
  • Add This - There just never seemed to be a handy way to share the site or article with your network until Add This. Simply click and choose the method of sharing (Twitter, FB, Stumbleupon, etc) and you are done (all browsers)
  • Advanced Periodic Table - Just what it says. (Chrome)
  • After the Deadline - Automatically checks Spelling, Style and Grammar in your emails or wherever else you might type in your browser. (Chrome, Firefox)
  • Autopager - When looking through Google or a blog with numerous posts, it can be tedious to click the next page. Autopager automatically moves to the next page just by scrolling down. (Chrome, Firefox)
  • Better Gmail - Gmail has a lot of great options and features, but it could get cluttered. This provides options to customize what you see and do not see in Gmail. Also, you can set Gmail to be your default email browser so clicking on an email link will send you to Gmail and not Outlook. (Chrome, Firefox
  • Chromed Bird - See your Twitter timelines without having to leave the page you are on. It is also highly convenient as you can click one button and tweet the page you are on (automatically shortened). (Chrome)
  • Chrome Remote Desktop - Access your computer from the browser or troubleshoot your students/family members computers. (Chrome) 
  • Cloud Save - With a right click, you can save an image, file or anything else in your browser to Dropbox, Google Docs and more. (Chrome)
  • Desmos - Has many of the features of Geogebra and CAS. Does not require Javascript. (all browsers)
  • DownThemAll - Imagine your luck, you stumble upon an entire page full of resources, but unfortunately, getting all of them will require you to save each one individually. Not with this extension. Use the DownThemAll toolbar and interface to select all or some of the links on a page. Then the addon will automatically do all of the hard work for you. Such a time/sanity saver. Although I primarily use Chrome, this extension alone is enough to keep Firefox installed on my computer. It is that helpful. (Firefox)
  • Google Quick Scroll - When looking through search results, you are seeking the closest match to your need. Yet when you open the page, sometimes that snippet can be buried in other information. This extension will allow you to jump to that specific section immediately. (Chrome)
  • Python - I have seen this kind of thing before but when I installed it, there it was, the Python interpreter! I was able to import the math module and loop which I have not seen in other versions. If you are using Python in the classroom you will definitely want to check this out. (Chrome)
  • Read It Later - Useful for saving pages to read for another time. (All browsers)
  • Translation - This is the World Wide Web which means that not all helpful pages will be in your language. The ability to translate for you or your students makes the world that much smaller. Note that any translation device or service is good at best and should not be solely relied upon for important information. (Google Translate - ChromeFoxlingo - Firefox, Translator - Firefox, GTranslate - Firefox)
  • WiseStamp - If you have multiple job titles, social networking accounts, or information that you want to share with various people. WiseStamp will automatically insert your signature with links to your Blogs, Facebook, Twitter, IM, Website, and more. Highly customizable and very easy to use. (Chrome, Firefox)
  • WolframAlpha - This computational search engine is now available as an extension and add-on. No matter what you teach, you can find a use for this in your class. (All browsers +mobile)
  • Xmarks - Educators have lots of great bookmarks and usually multiple computers (work, cellphone, home, etc). This will sync up those bookmarks and store them for you. (Note: If you are using Google Chrome you can set it up to do this as well in the settings. (All browsers)
  • YouTube Downloader - Does just what it says, useful if your school does not allow student access to YouTube. Or to share offline. Download the file in a small file size like .flv and email or share. (ChromeFirefox)
If you are interested in more or others here are the links:

Keep in mind that the more addons/extensions you add to your browser, the slower your browser startup could be. It also depends on what it does. Some are small and you can have numerous, others do very involved tasks and might take up a lot of memory. Experiment with what your computer can handle and your needs.

If you have any others that you think might appeal to a large group of educators, feel free to leave a comment, email, Facebook, or Tweet. Until next time.

Google Forms for Online, Easy, and Free Data Collection

In this world, data is king. Being able to gather and manipulate data is incredibly important. Keeping track of student information, conducting experiments in science class, administrative tasks, and all of the other instances where data streams through our lives.

The problem has been that data collection and analyzing has previously been expensive or tedious to do. Once again, Google has brought equity to the situation with Google Forms. Built into Google Docs, this form allows you to gather and understand data easily and from any computer with Internet.

How to use Google Forms:
1) Open Google Docs, click Create New, and select Form.
2) Title your Form and enter in any additional instructions you would like (e.g. make sure to answer in inches or all answers must be in complete sentences).
3) Now it is time to create questions for those who you send out the form to. Add a name and question text (e.g. true or false, coordinate points should be written as (x,y). You have 7 choices for question types:
  • Text: Short, one sentence responses
  • Paragraph Text: Longer responses
  • Multiple Choice
  • Checkboxes: Like multiple choice with options but more than one option can be selected.
  • Choose from a List: Like multiple choice but with a dropdown menu.
  • Scale: Set an upper bound and lower bound and submitters can provide a response in that range (e.g. describe your happiness on a scale from 1-5).
  • Grid: Like scale but with the ability to have more than one row or column.
4) Before clicking done, check the box if you would like to make sure that the question is answered before it can be submitted. 

5) After completing a question and clicking done, you have three options. 
  • Pencil: Edit the question again.
  • Boxes: Duplicate this question (so you can have it asked again or modify slightly.
  • Trash: Delete the question.


6) From there you can click the Add This button and add more questions or page breaks.
7) Change the theme if you would like.
8) If you are using Google Apps you can have the Form automatically collect the submitters' name (by clicking the checkbox near the top of the form), and if you are using a personal Gmail account I would recommend adding a question which asks their name. This will prevent duplicate submissions and assist with accountability.
8) Now to send out the form to those who need it:
  • Click Email this Form to send the form out via email. You have the option to embed the form into the email.
  • Click More Actions to embed the form in your website or blog.
9) All of your data will be collected in a Google Spreadsheet. To see the data, you can either go to the main Google Docs or click on See Responses and then Spreadsheet.
10) From the spreadsheet you can click Insert and Chart if you would like to see it graphed. Or click Tools and Sort to order it in a particular way.

Suggestions for using Google Forms:
  • Collecting Data: 
    • I have seen teachers use a Google Form to collect data from a project. For example, students could use phones to submit their information for class averages and analysis.
    • Our school has a policy against MP3 players in the class, I collect data from the students about a Google Form about a band that relaxes them and one that energizes them and input this information into Pandora. I then have music to play in the class when students are working.
  • Polling: 
    • Last year our ASB made the switch from collecting and tabulating results from their elections from paper to Google Forms. The difference was that results were released in hours as opposed to a day and much less headache.
  • More great examples can be found here.
I hope you benefit as greatly as I have from this technology. If you have any questions or suggestions leave it in the comments.


Links:
GSites - Websites
GForms - Data Collection and Surveys